4 Pin to 7/9 Pin Adapter Kits.
Background and Motivation
Back in early 2015, I came into posession of a US Army Signal Corps BC-AN-230 transmitter. There was only one problem, it did not come with any tubes and I quickly determined that the original VT-25A and VT-52 tubes were very expensive! The BC-AN-230 was put on the shelf while I decided what to do.
Some time later, there was a post on the ARC-5 mailing list by Dave, AB5S that described a method of using 7-pin (6AQ5) and 9-pin (5763) miniature tubes to replace the original VT-25A and VT-52. Dave had devised a method of retaining and connecting the miniature socket via wires going through the pin sockets of the VT-25A and VT-52 sockets. The addition was easily reversable and worked well.
I remembered my BC-AN-230 sitting on the shelf and knew that miniature tubes were the answer to the problem of the expensive original tubes. I also decided that I wanted to come up with a method of using the miniature tubes via some sort of plug-in adapter. After about a half-dozen prototypes, I was happy with the solution I had come up with. During the development of my prototypes, I shared my progress with the ARC-5 mailing list. I was rather surprized that so many people were interested in buying these adapters.
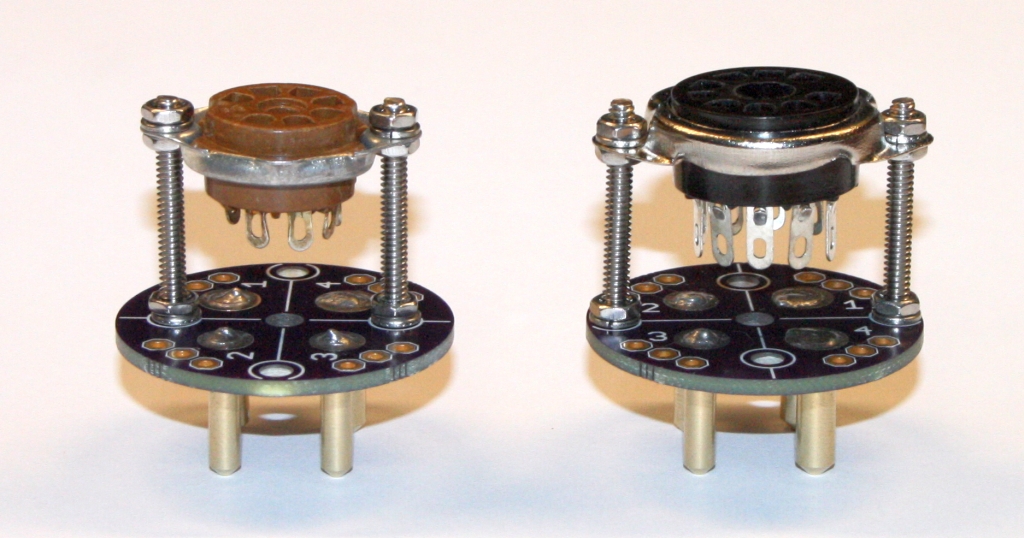
Here is the final solution I came up with:
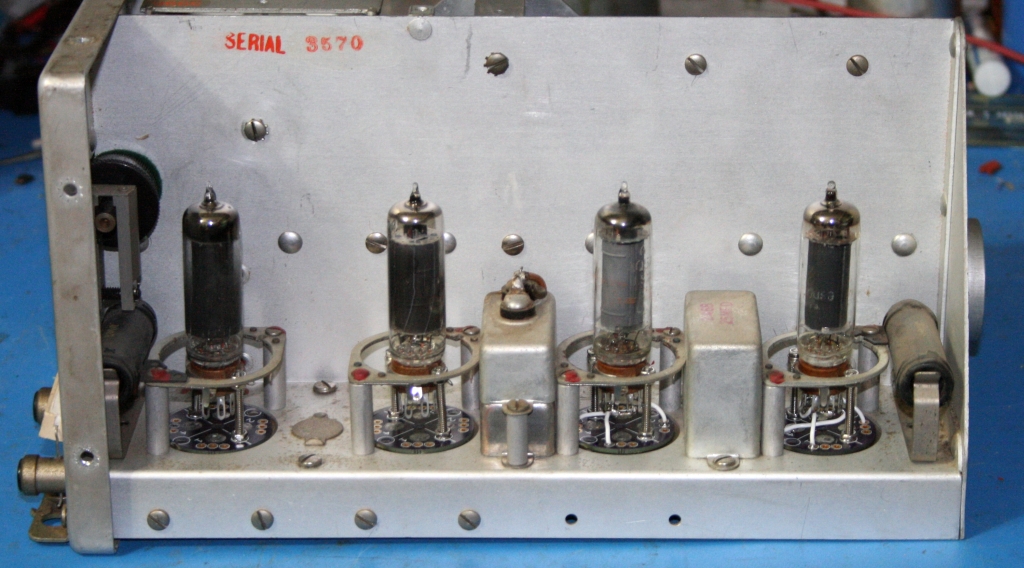
Here are four of configured with 7-pin sockets with 6AQ5 tubes installed in a BC-230 transmitter. The two on the left two have not been wired yet:
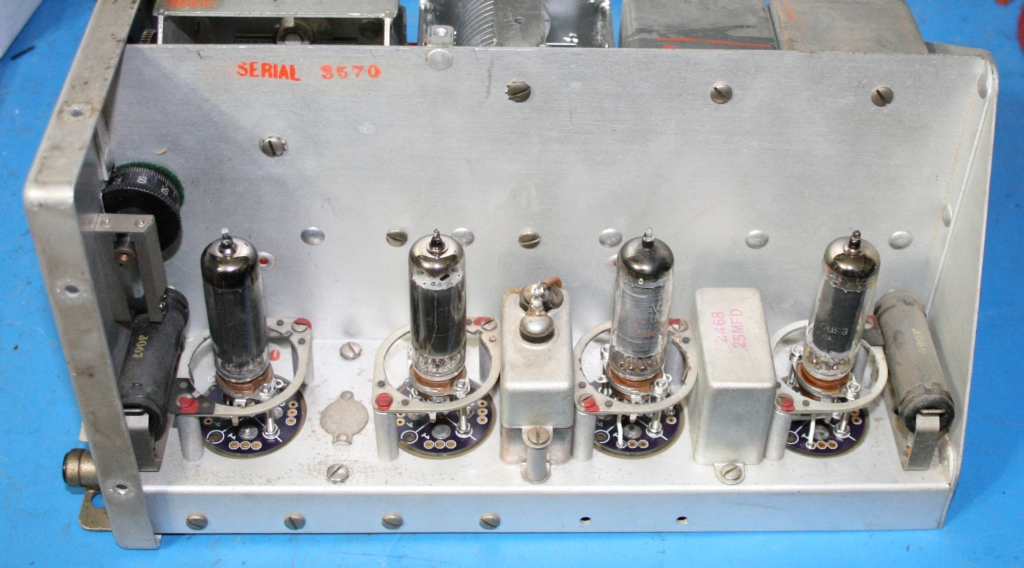
Another view:
Design Notes:
The pins are custom machined from brass and are equal in diameter to a specification sheet I was able to find online for the 4-pin tube base. The Printed Circuit Board (PCB) is custom designed and fabricated in the USA, with the pins being soldered into very large vias using a custom-made soldering jig. Each pin is brought out to three solder pads, which will give the end user flexibility in how they wish to attach the four pin base to the lugs on the mini tube sockets. The tube sockets are of new manufacture. The supports for the sockets are 4-40 flat-head screws, retained by small-pattern nuts and lockwashers. The screws, nuts, and lock-washers are all stainless steel.
They will be supplied in kit-form, with the exception that the brass pins will be pre-soldered into the PCB. Soldering the pins without using the soldering jig is not possible and will result in crooked pins.
Two types of kits will be available - kits with a 7-pin miniature socket and kits with a 9-pin miniature socket. Also available are the custom PCB / brass pin base assemblies for those who wish to use them in other applications.
Kit Contents:
7-Pin Miniature Kit
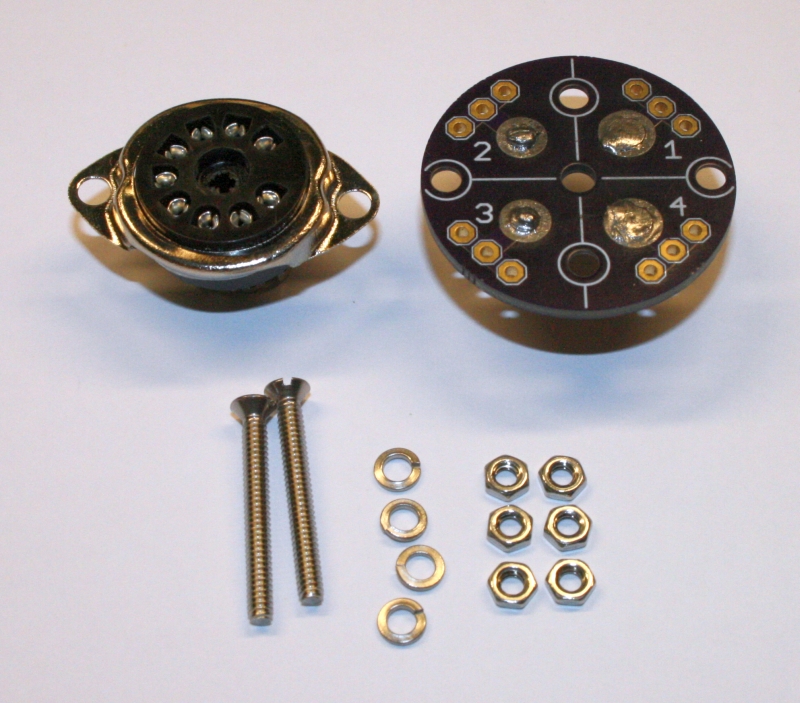
Top view and bottom view:
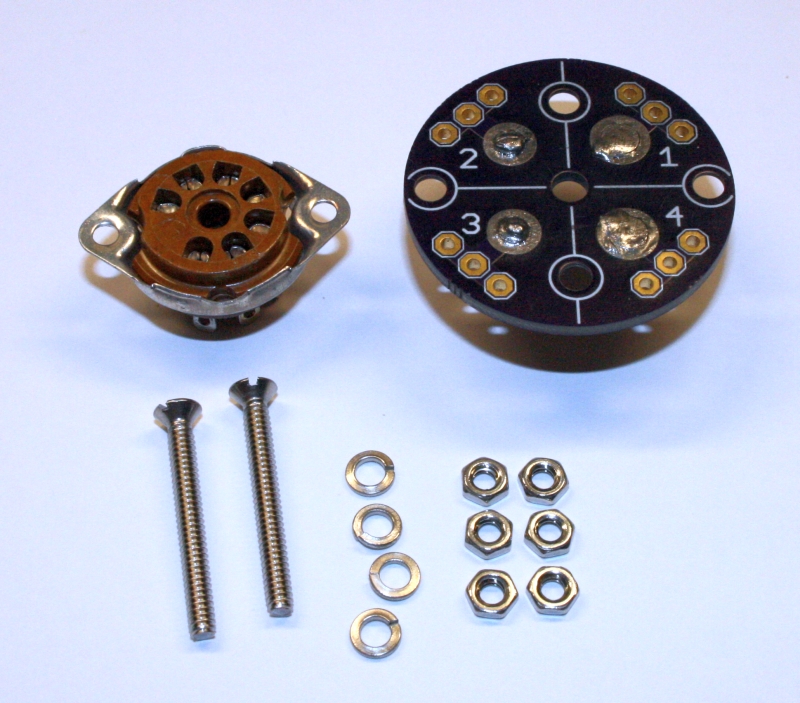

The 7-pin kit contents:
1) Quantity 2, flat-head 4-40 machine screws.
2) Quantity 1, custom PCB / brass pin base assembly.
3) Quantity 6, small pattern 4-40 hex nuts.
4) Quantity 4, split lock washers.
5) Quantity 1, 7-pin miniature tube socket.
9-Pin Miniature Kit
Top view and bottom view:
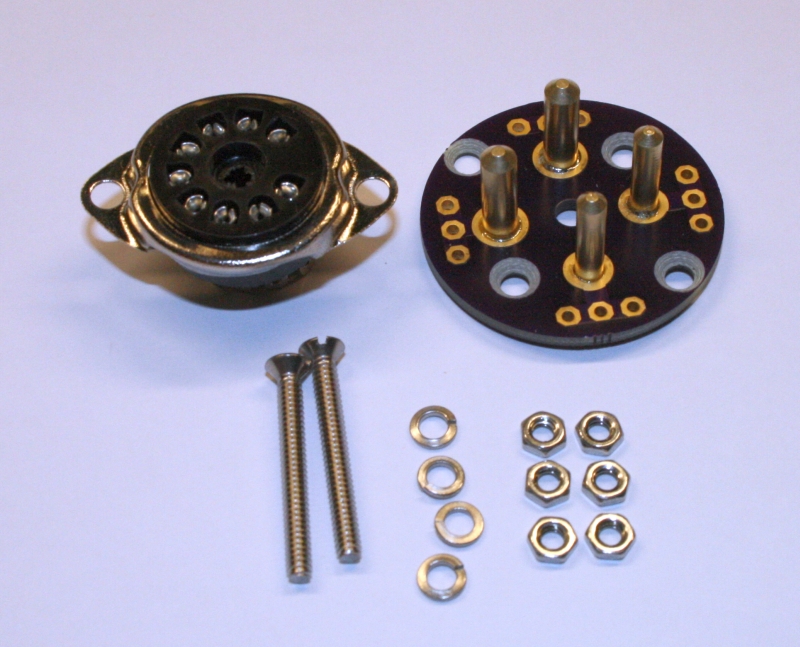
The 9-pin kit contents:
1) Quantity 2, flat-head 4-40 machine screws.
2) Quantity 1, custom PCB / brass pin base assembly.
3) Quantity 6, small pattern 4-40 hex nuts.
4) Quantity 4, split lock washers.
5) Quantity 1, 9-pin miniature tube socket.
Assembly Instructions
Assembly is not difficult and some may be able to look at the finished product and not need any instructions. However, there is an order of operations that will make it easier, which is what I present below.
Step 1: Determine the connections you need for your application.
(NOTE: The ARC-5 mailing list archives contain several hook-up diagrams for using a 6AQ5 or 5763 tube to replace the VT-25A and VT-52 tubes.)
Step 2: Solder a length of wire to the appropriate pins' solder lugs on the miniature tube base.
(NOTE: For some applications, two or more pins on the miniature tube socket will need to be connected to a single pin the PCB. You can use jumpers between the solder lugs on the socket, or a separate wire for each solder lug.)
Step 3: Secure the pair of 4-40 flat-head screws to the PCB with a lock-washer and a nut. For the 7-pin version, you want the pair of holes that are closer together (between the numbered pins 1 and 2, and between 3 and 4). For the 9-pin version, you want the pair of holes that are further apart (between the numbered pins 1 and 4, and between 2 and 3). Tighten them snug, not tight.
(NOTE: If you tighten them tight, installation of the tube socket may be difficult.)
Step 4: Install two nuts onto the 4-40 flat-head screws. Run them about half-way down the length of the screw.
Step 5: Install the socket onto the two flat head screws.
Step 6: Install a lock-washer and a nut on each 4-40 flat-head screw. Leave a couple of threads showing. The length from the top of the screw to the nut should be equal on both sides.
Step 7: To retain the socket, run the two nuts that were installed half-way down the screws up against the bottom of the socket. Snug them up.
Step 8: At this point, tighten the two nuts that are against the PCB.
Step 9: Tighten the nuts that retain the tube socket.
Step 10: Cut your wires installed in Step 2 to the correct lengths, and solder them to the pads on the PCB as determined in Step 1.
The end product should look something similar to the below.
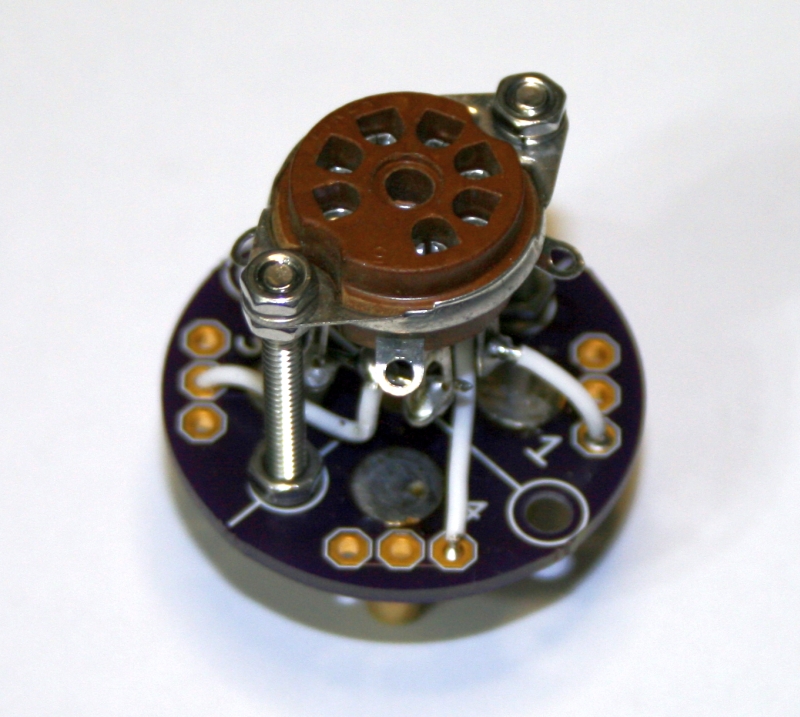
This is a 7-pin kit wired for a 6AQ5 to replace a VT-52 or VT-25. Please note that the socket is one from my junk-box and the ones supplied with the kits do not have the four ground lugs around the perimeter of the tube socket.
How to Order and Pricing.
To order, please contact me via e-mail at:

Note that the above is an image to foil spammers.
Pricing:
1 kit (your choice, 7 or 9 pin) - $10, plus $9.20 for Priority Mail shipping in the USA.
4 kits (your choice, 7 or 9 pin) for $40 which includes shipping by Priority Mail in the USA.
1 custom PCB / brass pin base assembly - $7, plus $9.20 for Priority Mail shipping in the USA.
4 custom PCB / brass pin base assemblies - $30 which includes shipping by Priority Mail in the USA.
If ordering the PCB / brass pin base assemblies, please let me know if you would like the center hole to be countersunk from the pin side. This would allow flush mounting of a screw and drawer pull knob or other method of making a handle for easy removal.
For quantities greater than the above, please contact me.
Outside the USA, please contact me so I can calculate shipping.
Payment by Paypal to the above e-mail address is preferred. I'll be happy to send a PayPal invoice with your total.
Thanks much and 73! Ben, KD5BYB.